Hi all
I’m back with the final installment on how our Gates SA-70 preamps are crafted. Today, we’ll focus on the enclosure, layout, and metalwork. We’re moving a bit in reverse, as this is usually the first step in building a preamp.
Lets start with parts we are going to need for a single channel preamp enclosure:
- Chassis Box – Hammond, Aluminum, 17″ x 8″ x 3″
- Cover Plate – Hammond, Aluminum, 17″ x 8″, 20 Gauge
- Flat 2U faceplate
- Switchcraft 3 Pin XLR Female
- Switchcraft 3 Pin XLR Male
- IEC Power Input
- Fuse holder
- Misc hardware to attach faceplate
- Any pots, switches or meter than’ll be attached to the faceplate
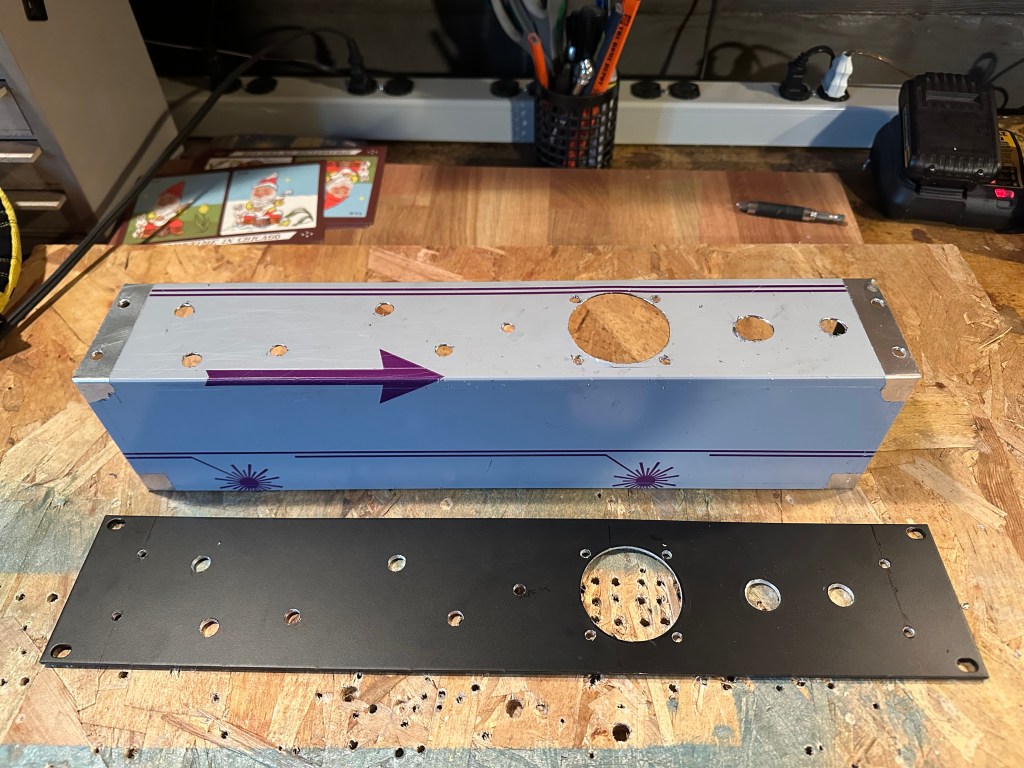
First, I measure and mark all my holes on the faceplate and chassis box.

This is where the importance of layout comes into play. For better noise levels, try to keep all the power supply elements on one side of the chassis. The farther away they are from any unbalanced high-impedance signals, the better. For the best signal-to-noise ratio, I often build the power supply in an external box and use a 5-pin XLR and cable to run power to the main unit. In this example, we are building the power supply within the unit
Next up, start drilling out the four holes that will mount the faceplate to the chassis. I use a standard DeWalt drill, RED HELIX cobalt drill bits, Greenlee radio chassis hole punches, and some inexpensive Amazon stepped drill bits.
Once I’ve drilled out the four holes on both the faceplate and chassis, I mount the faceplate to drill the remaining holes. This ensures a uniform, consistent hole set, making mounting much easier later on.

I start with smaller bits and work up to larger bits. Eventually, I have everything drilled out as pictured below.
At this point, if I’m not keeping the faceplate black, I’ll sand it down and paint it. I do this step now so I can continue drilling out the chassis while the first coat of paint dries. I beginning to learn how to powder coat, but currently I use spray paint and polyurethane for the faceplate. These are some of favorites to use:
- https://www.homedepot.com/p/Rust-Oleum-Stops-Rust-12-oz-Hammered-Gray-Protective-Spray-Paint-7214830/100151873
- https://www.homedepot.com/p/Rust-Oleum-Stops-Rust-12-oz-Hammered-Black-Protective-Spray-Paint-7215830/100146848
- https://www.menards.com/main/paint/spray-paint/all-purpose-spray-paint/krylon-reg-fusion-all-in-one-reg-satin-spray-paint-primer-12-oz/k02943007/p-1642874301325498-c-8050.htm
- https://www.menards.com/main/paint/spray-paint/all-purpose-spray-paint/krylon-reg-colormaxx-trade-paint-primer-12-oz/k05576007/p-1642874294533285-c-8050.htm

I continue drilling out the remaining holes in the rear and bottom of the chassis to mount the remaining connectors, power transformer, etc. Next, I’ll mount everything I can that doesn’t require the faceplate.


Now we’ve got a fully assembled chassis and have applied a few coats of paint to our faceplate. Next, I’ll start soldering and wiring components, doing as much as I can without needing the front panel parts. Once the panel is dry, I mount it and finish all the wiring. Eventually, it looks like the picture below.
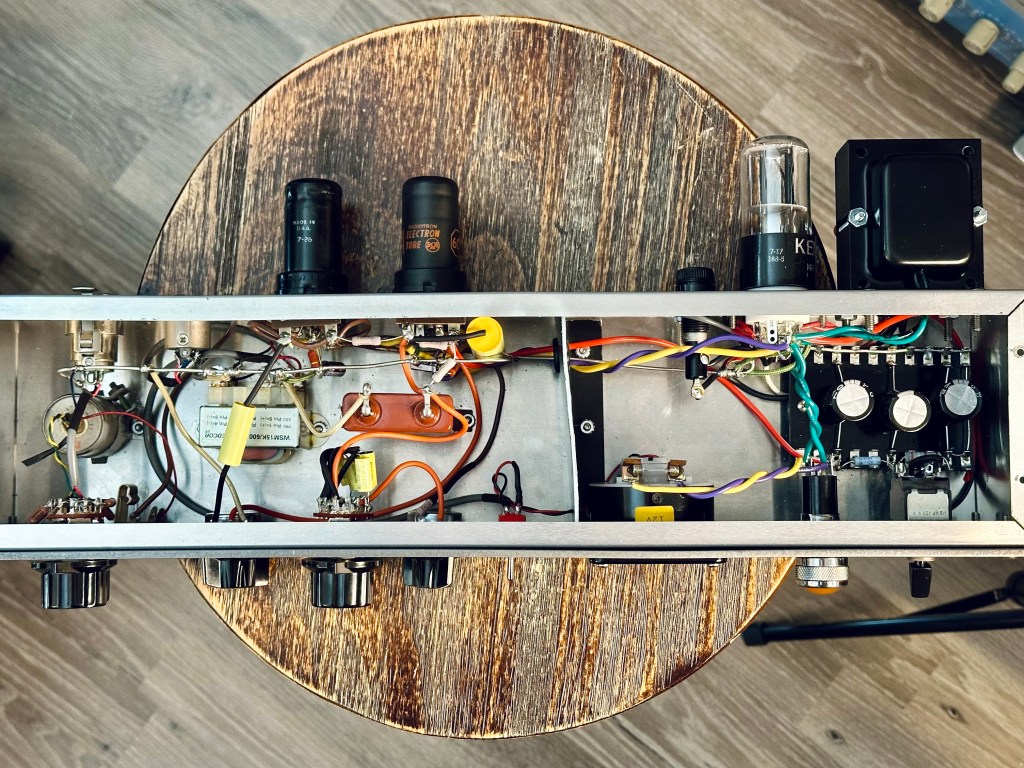
One important detail to highlight is the piece of aluminum mounted between the power supply components on the right-hand side and the rest of the circuit on the left. This drastically reduces power supply noise and, for me, is a necessity in a preamp build of this size.
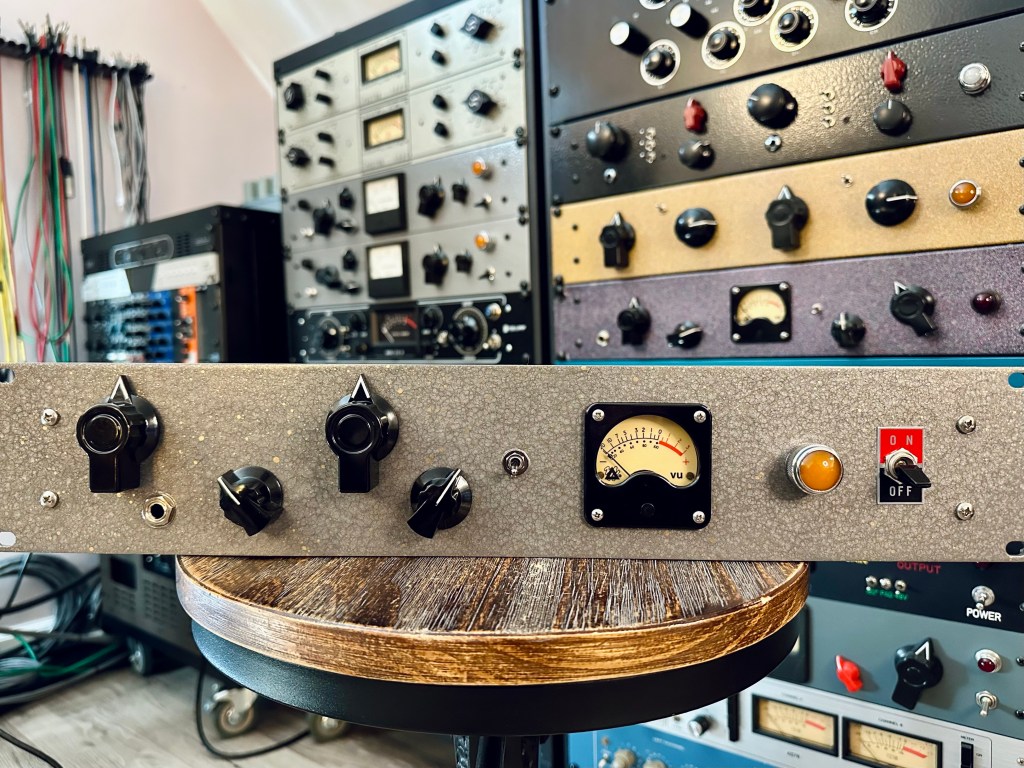
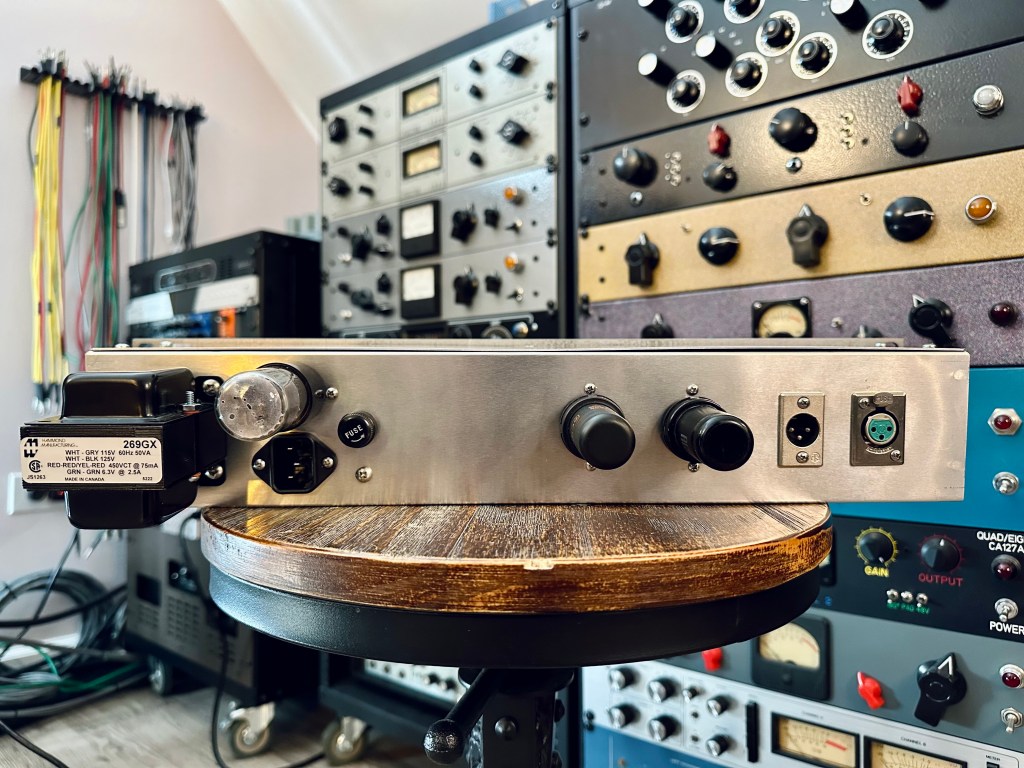
Below is the final product. I hope this series has helped answer any questions you might have about building your own DIY preamp. If anything comes up along the way, feel free to ask questions. I’ll do my best to help where I can.
Thanks for reading!

Leave a comment