
Giving the Altec Lansing 342B a Proper Studio Output
Building a passive 16Ω load box with a vintage ADC transformer, balanced 600Ω output, and VU metering.
Like many of us, I fell in love with vintage Altec tube and solid-state gear pretty early in my recording career. There’s something about the Altec name, the industrial design, and, of course, that unmistakable green color that draws you in. I’ve always appreciated equipment from this era, not only for the way it sounds but also for the way it was engineered and built.
One challenge I’ve encountered over the years is figuring out how to integrate some of this older equipment into a modern recording studio without hacking up the original circuitry. Often, these pieces were designed for applications quite different from how we’d like to use them today.
The Altec Lansing 342B tube mixer is a great example.
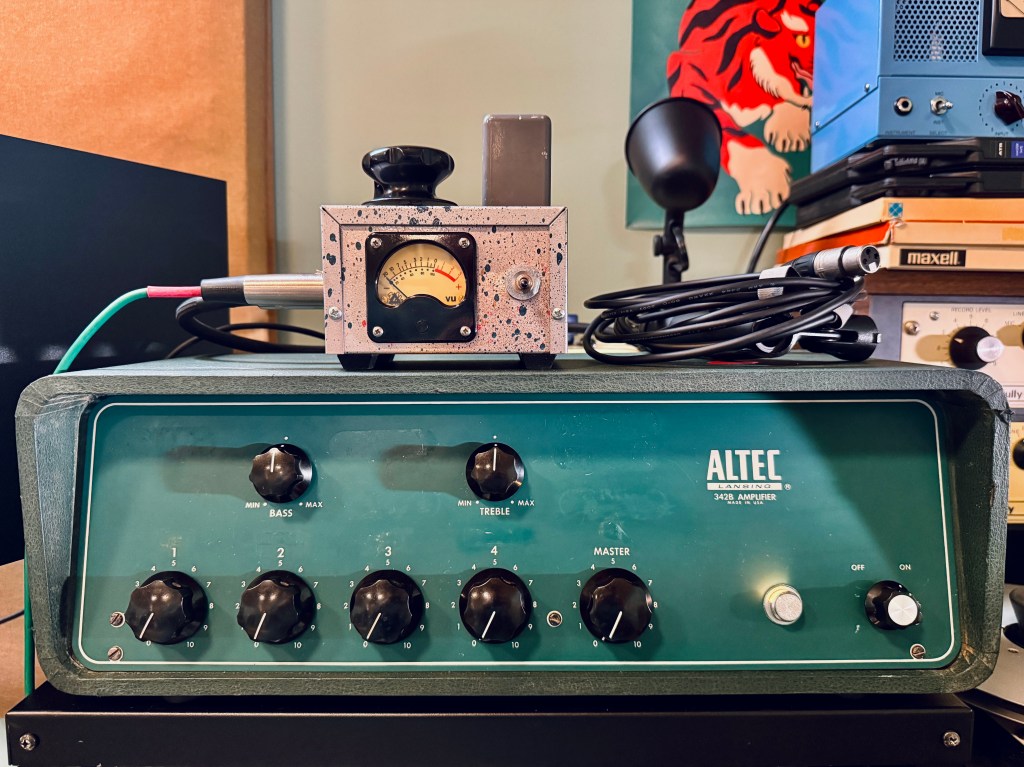
At first glance, the 342B looks similar to the Altec 1567A or 1566-series preamplifiers, both of which have found their way into recording studios over the years. But the 342B is a slightly different animal. While it shares some of that classic Altec DNA, it was designed primarily as a public-address mixer/amplifier rather than a dedicated recording preamp.
It features four microphone inputs, individual channel controls, bass and treble adjustments, a master volume, and a push-pull pair of 7027 output tubes delivering approximately 35 watts. Rather than providing a conventional 600Ω balanced line-level output, the 342B was designed to drive loudspeakers directly, with 4Ω, 8Ω, and 16Ω speaker outputs and a 70V distribution output.
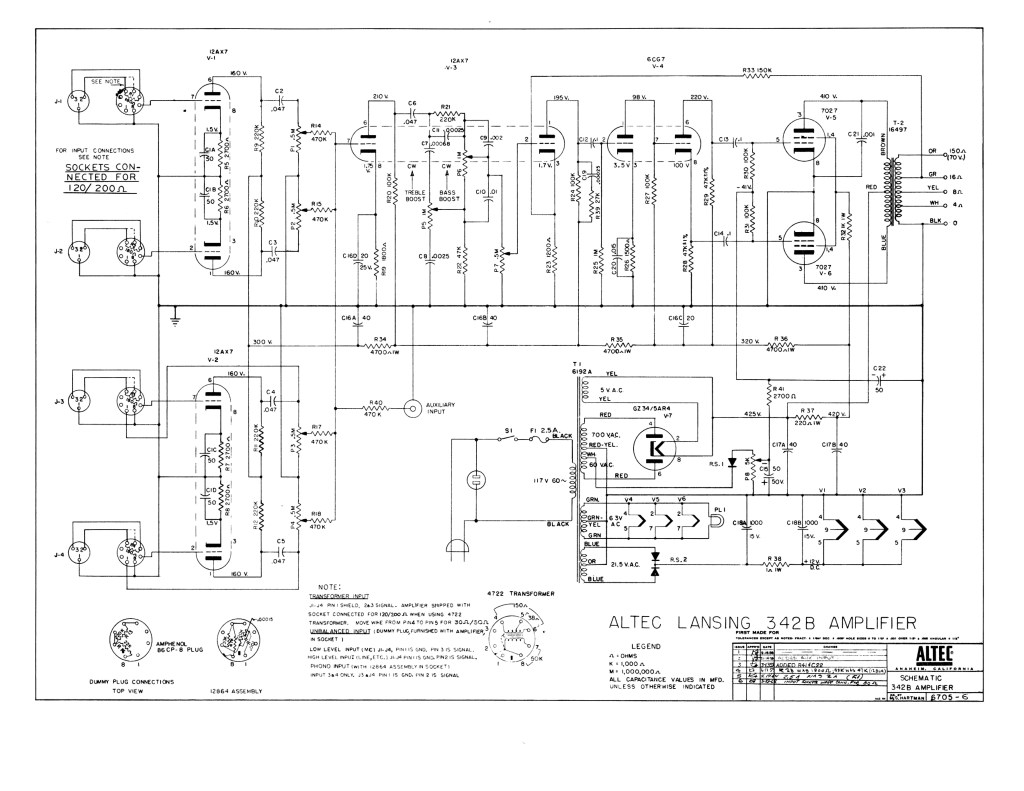
That’s great if you’re using it as a small PA amplifier or even experimenting with it as a guitar amplifier. It’s less convenient when you want to connect it directly to a recording console or audio interface.
My goal was pretty simple: preserve the original amplifier as much as possible, retain the ability to use it as a guitar amplifier, and create a proper transformer-balanced output for studio recording.
I also wanted to capture the sound of the entire amplifier, including its 7027 power stage and original output transformer, rather than simply pulling a signal from somewhere earlier in the circuit.
The solution I landed on was an entirely external passive load box.
Why an External Load Box?
One of the more interesting things about the 342B is that its power amplifier is an important part of the circuit. Rather than bypassing it, I wanted the option of capturing whatever coloration it contributes to the sound.
The challenge is that a tube amplifier’s output transformer needs to see an appropriate load. You can’t simply connect a 10k:600Ω line transformer directly to the 16Ω speaker output and expect it to replace a speaker.
Instead, I decided to build a small enclosure that would connect to the 342B’s existing 16Ω speaker output and serve two functions: provide the amplifier with a proper load and derive a balanced, attenuated signal for recording.
This also meant I wouldn’t have to drill holes in the Altec, replace its original output transformer, or permanently alter its internal wiring.
The 16Ω Dummy Load
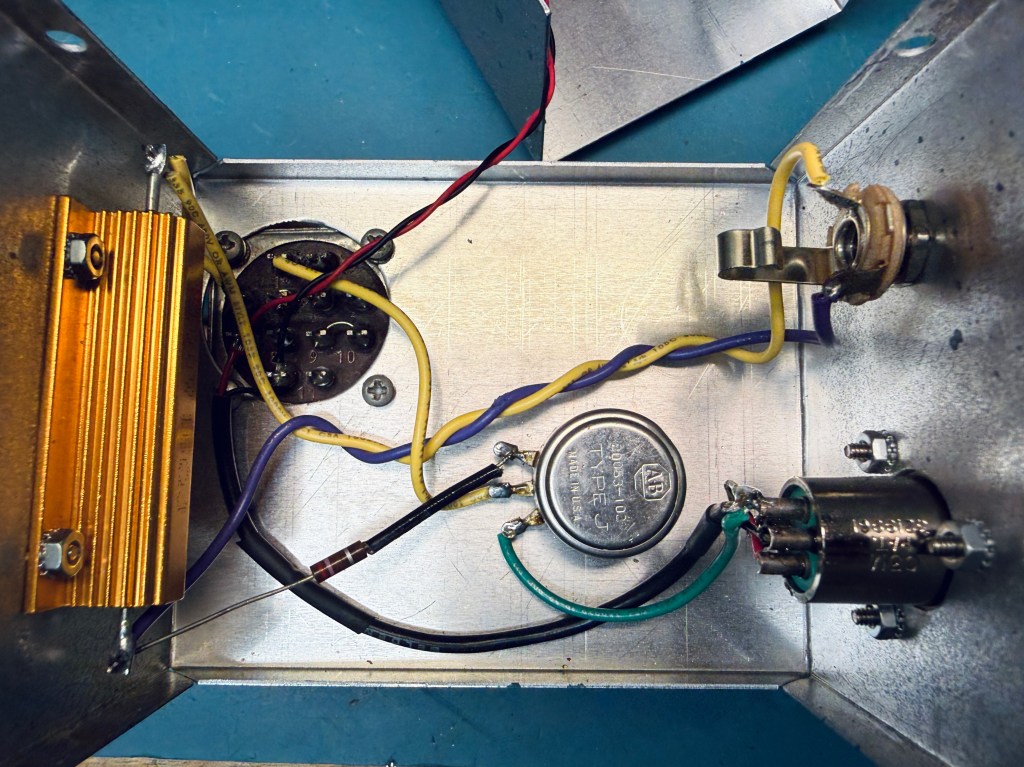
The first component in the box is a 16Ω, 100-watt power resistor, connected across the speaker input.
This resistor takes the place of a 16Ω speaker, allowing the amplifier to operate without a physical speaker cabinet connected. The power being delivered by the amplifier is dissipated as heat instead of being converted into sound.
I chose a 100-watt resistor to provide some margin over the 342B’s approximately 35-watt rated output.
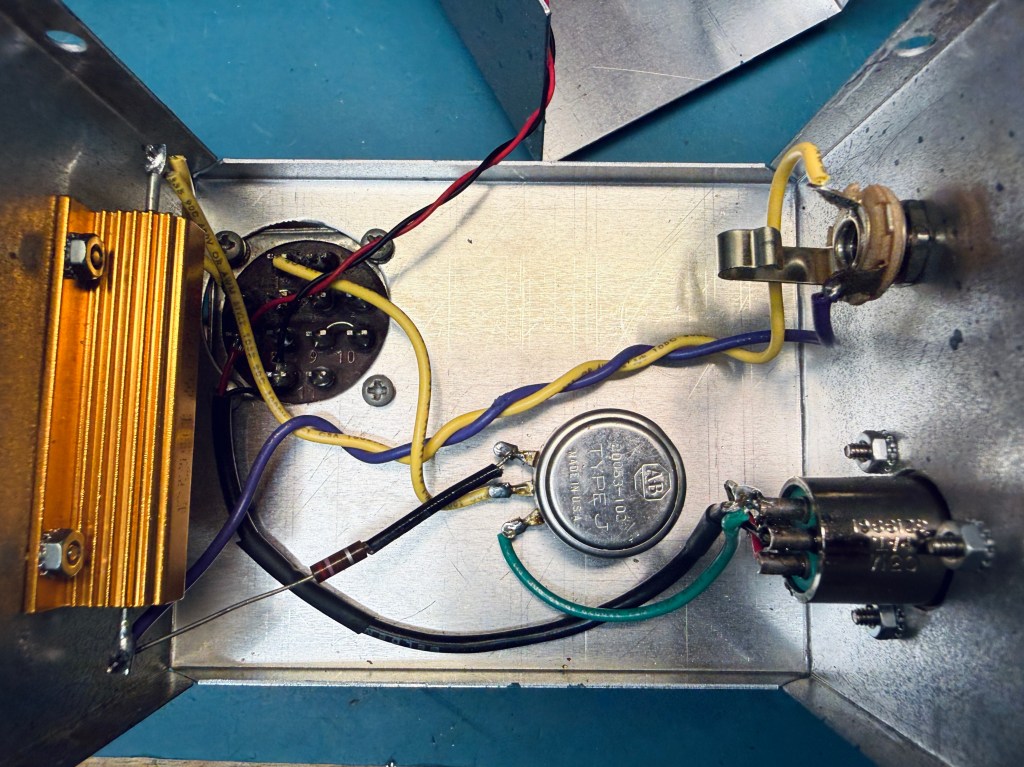
One thing I learned pretty quickly is that a 100-watt resistor can still get surprisingly hot. That rating doesn’t mean it’s only producing heat when you approach 100 watts. Even at much lower power levels, the resistor converts the amplifier’s output energy into heat.
The resistor is mounted inside the metal enclosure, although proper heatsinking and ventilation are still important considerations for sustained use.
Getting the Signal Down to Line Level
With the amplifier properly loaded, the next step was taking the speaker-level signal and reducing it to something appropriate for a recording interface or console.
I experimented with a resistive attenuator consisting of a fixed resistor feeding a 1kΩ log potentiometer. The potentiometer gives me a dedicated output-level control without modifying the Altec’s original master volume.
I initially used a 1.5kΩ series resistor, but found that I needed to drive the Altec harder than I wanted to achieve a useful recording level. That also meant more output power being dissipated by the dummy load.
After some experimentation, I changed the series resistor to 220Ω, which ended up being a much better fit for my setup.
The revised circuit lets me obtain a healthy line-level signal without having to run the amplifier nearly as hard. The 1kΩ potentiometer still gives me plenty of control over the final output level.
It’s a simple circuit, but sometimes that’s all that’s needed.
The Vintage ADC Output Transformer
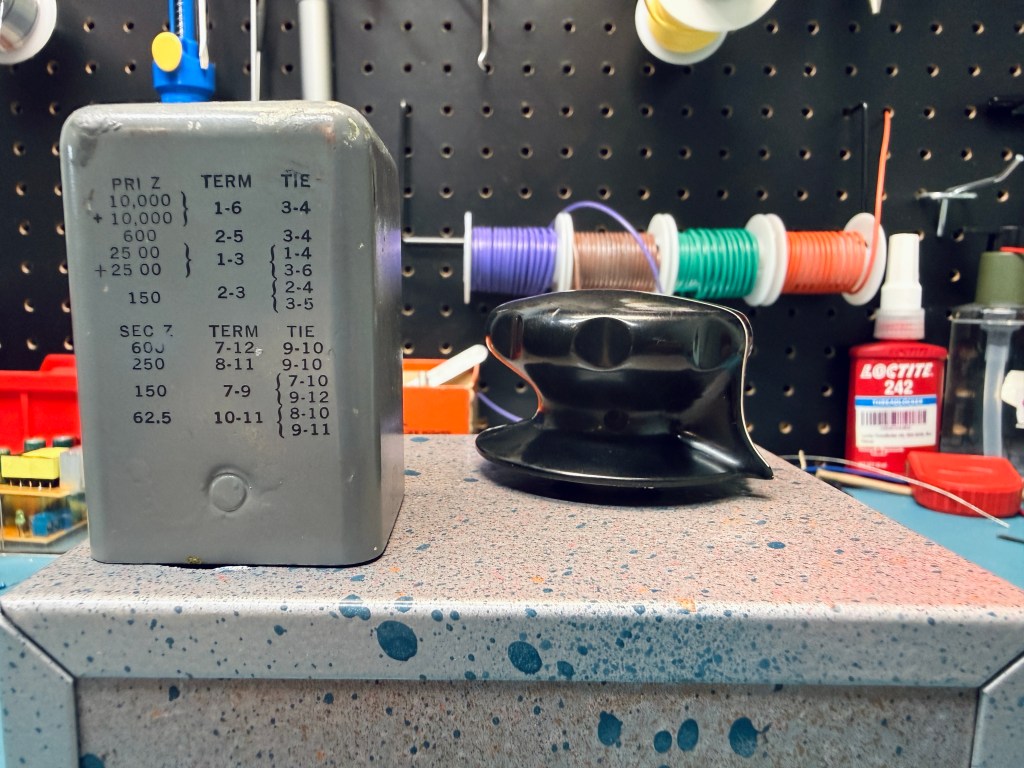
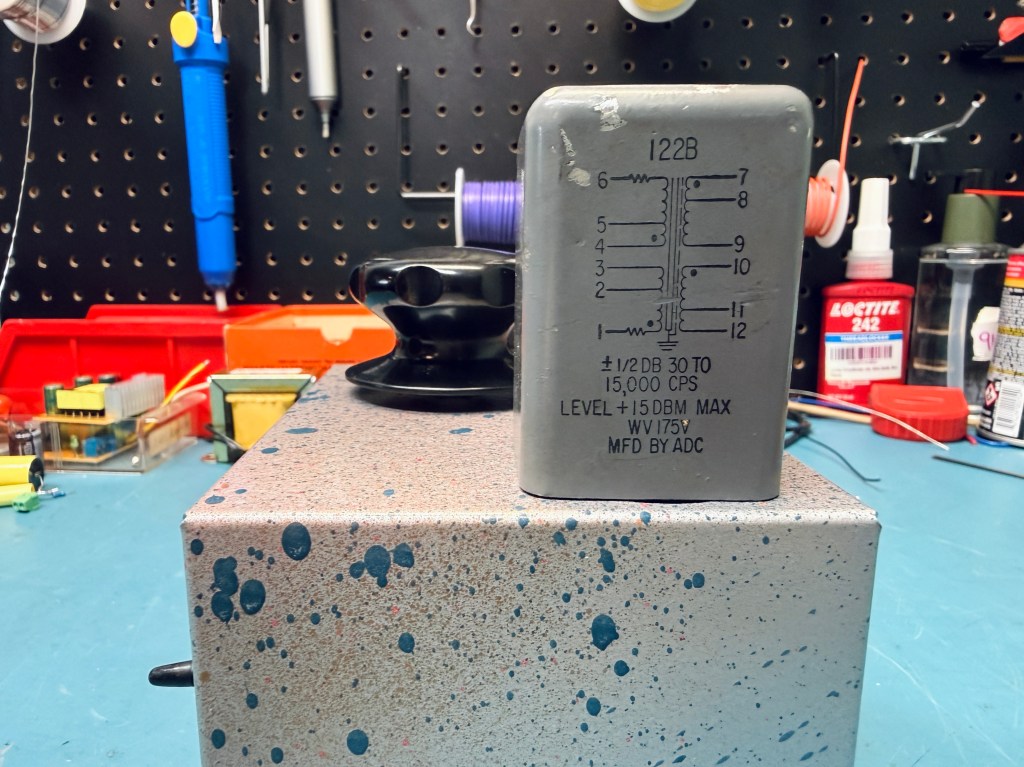
For the balanced output, I found a vintage ADC 122B transformer.
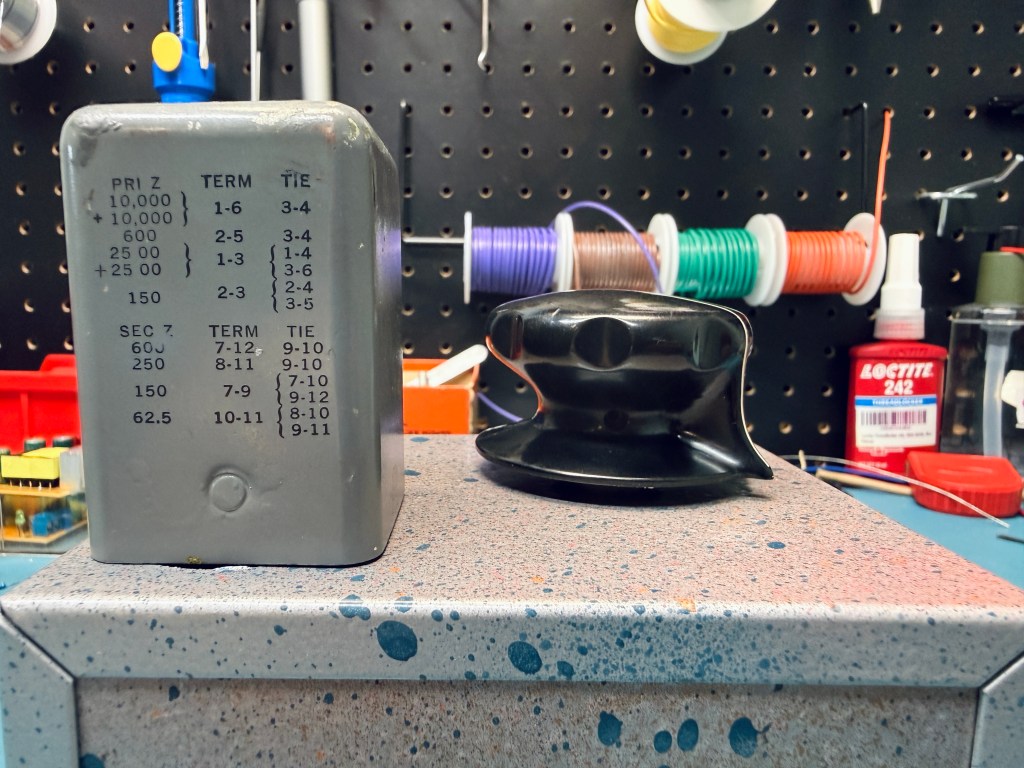
ADC made some wonderful professional audio transformers, and this particular model offers several configurable primary and secondary impedances. For this project, I wired it for a 10kΩ primary and 600Ω secondary.
The transformer provides the voltage reduction and isolation needed to create a balanced output suitable for a console or audio interface.
According to the markings on the transformer, its maximum rated signal level is +15 dBm. That’s an important consideration, particularly because the box is taking its signal from a power amplifier capable of producing significantly more power than a conventional line-level source.
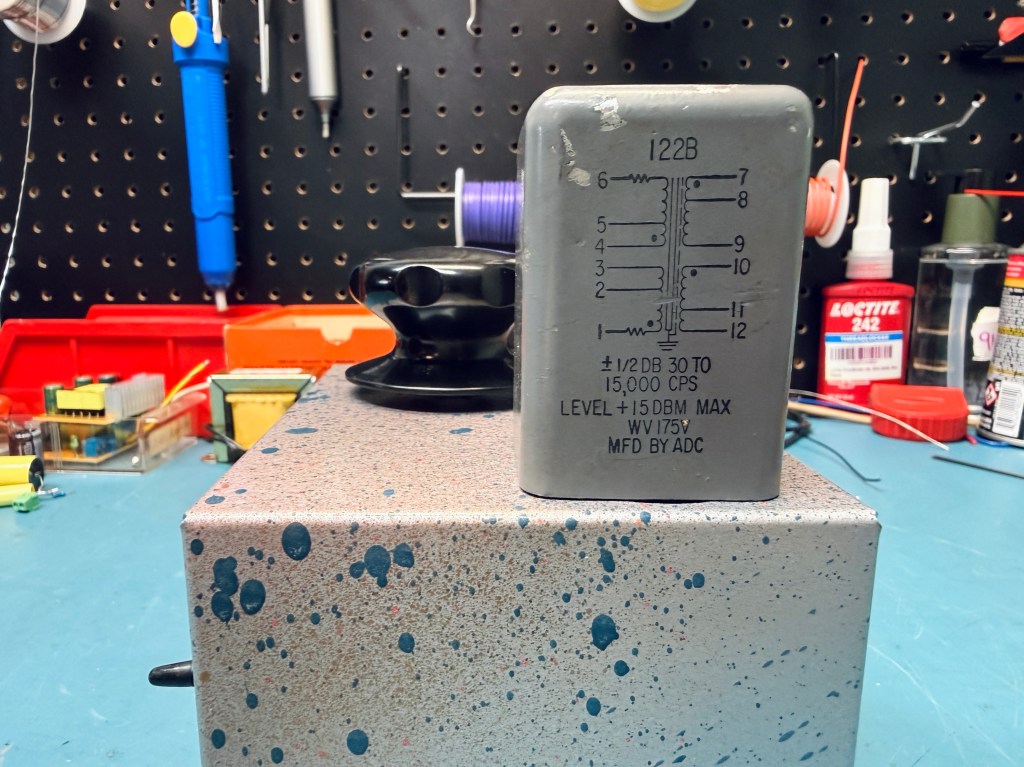
The attenuator ahead of the transformer allows me to manage the signal level, although the amplifier’s master volume still needs to be operated within sensible limits.
The result is a floating, transformer-balanced output connected to a standard male XLR connector.
Beyond the practical benefit of balanced audio, I also liked the idea of using a vintage transformer from roughly the same general era as the amplifier.
Adding a VU Meter
Once the basic circuit was working, I decided the box needed a little something extra.
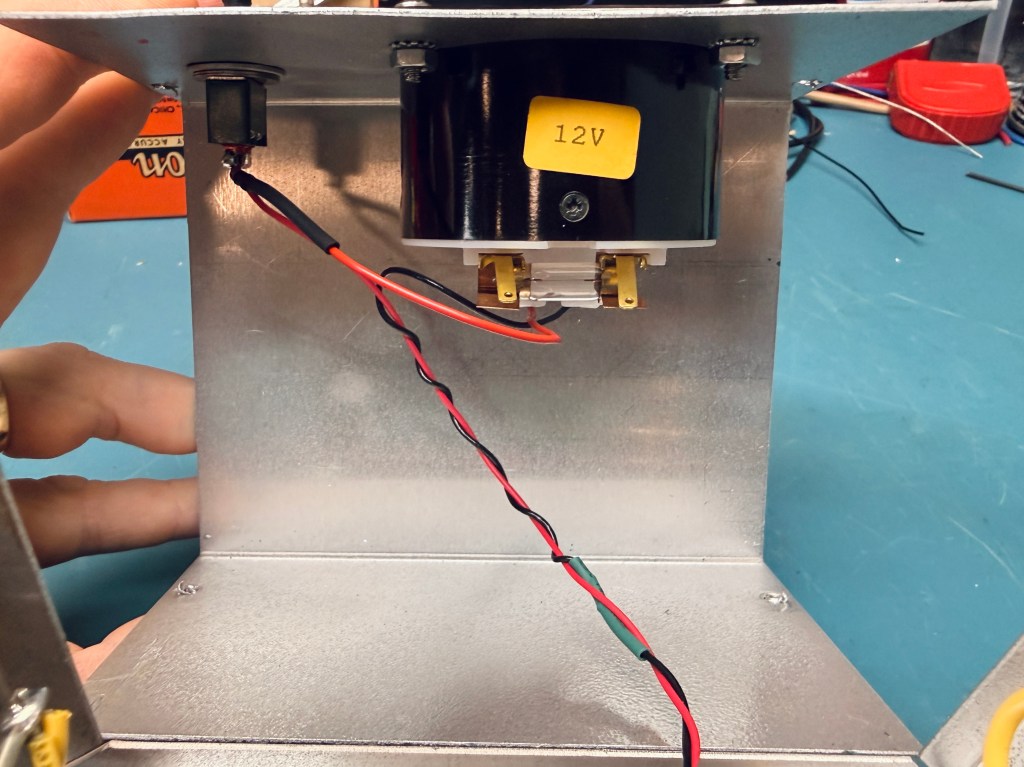
I had a small analog VU meter that fit the aesthetic of the project, so I added it to the front panel along with a toggle switch.
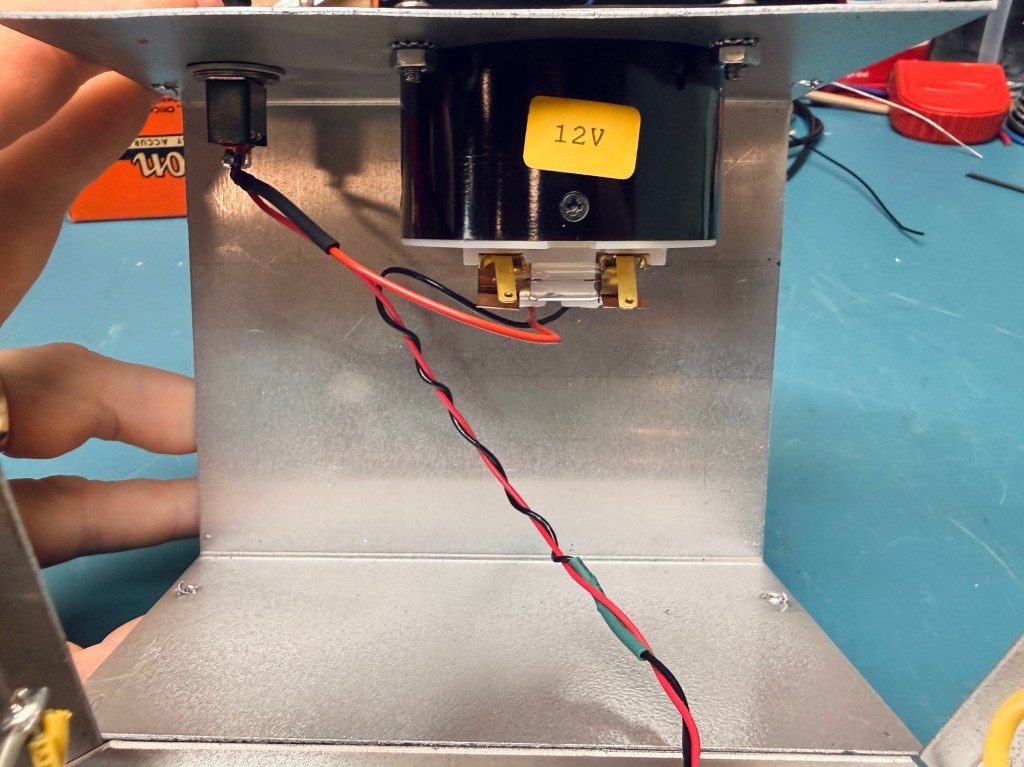
The meter has an internal bridge rectifier and is connected across the balanced XLR output through a 3.6kΩ series resistor.
This is a conventional way of connecting a suitably specified VU meter to a line-level signal, although the correct resistance ultimately depends on the meter movement.
I also added a switch so that I could completely remove the meter circuit from the audio output when desired.
In practice, switching the meter in and out has had very little, if any, audible effect on the signal. Still, having the option to disconnect it seems worthwhile, especially with a completely passive design.
The meter isn’t essential to the circuit, but it makes the box a lot more enjoyable to use.
And, if I’m being completely truthful, I think almost everything looks better with a VU meter.
The Finished Box
The final design is pretty straightforward:
- Input: ¼-inch TS speaker-level connection from the Altec’s 16Ω output.
- Dummy load: 16Ω, 100-watt power resistor connected across the input.
- Attenuator: 220Ω series resistor feeding a 1kΩ linear level control.
- Transformer: Vintage ADC 122B, configured for 10k:600Ω.
- Output: Transformer-balanced male XLR.
- Metering: Switchable analog VU meter with a 3.6kΩ series resistor.
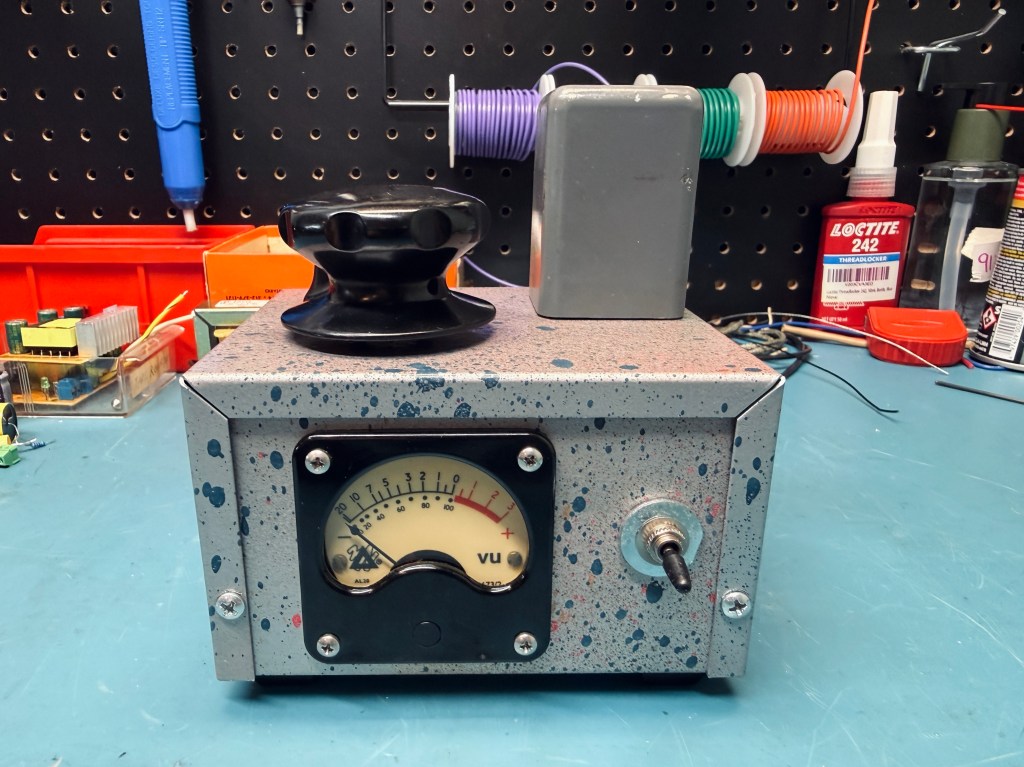
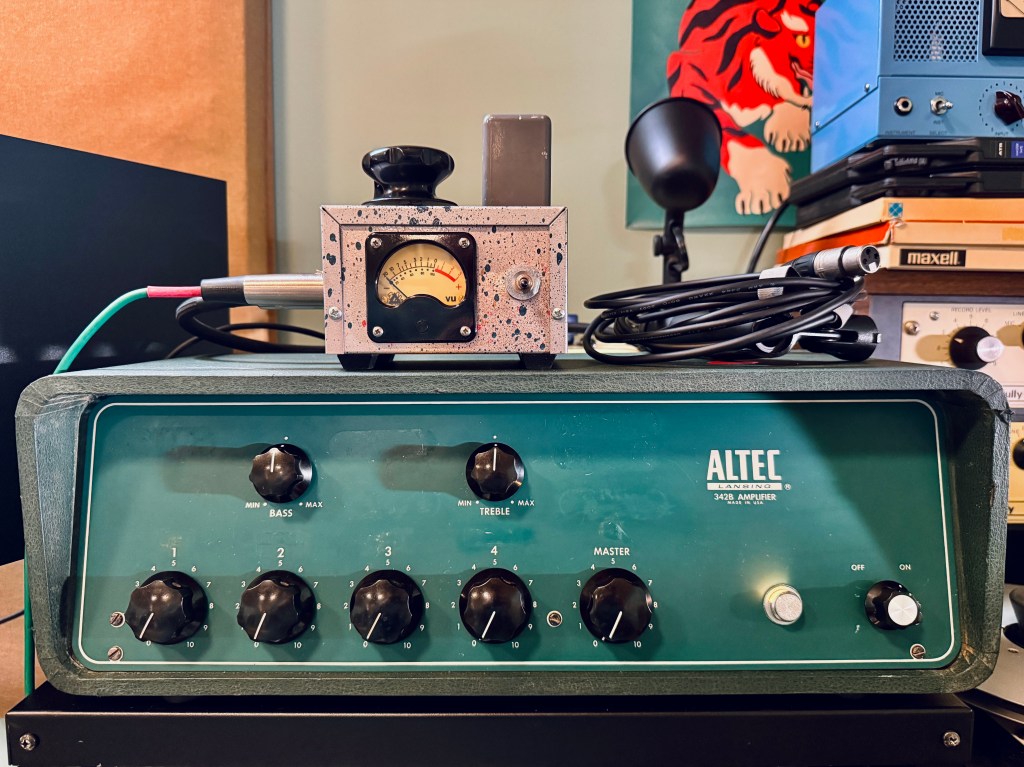
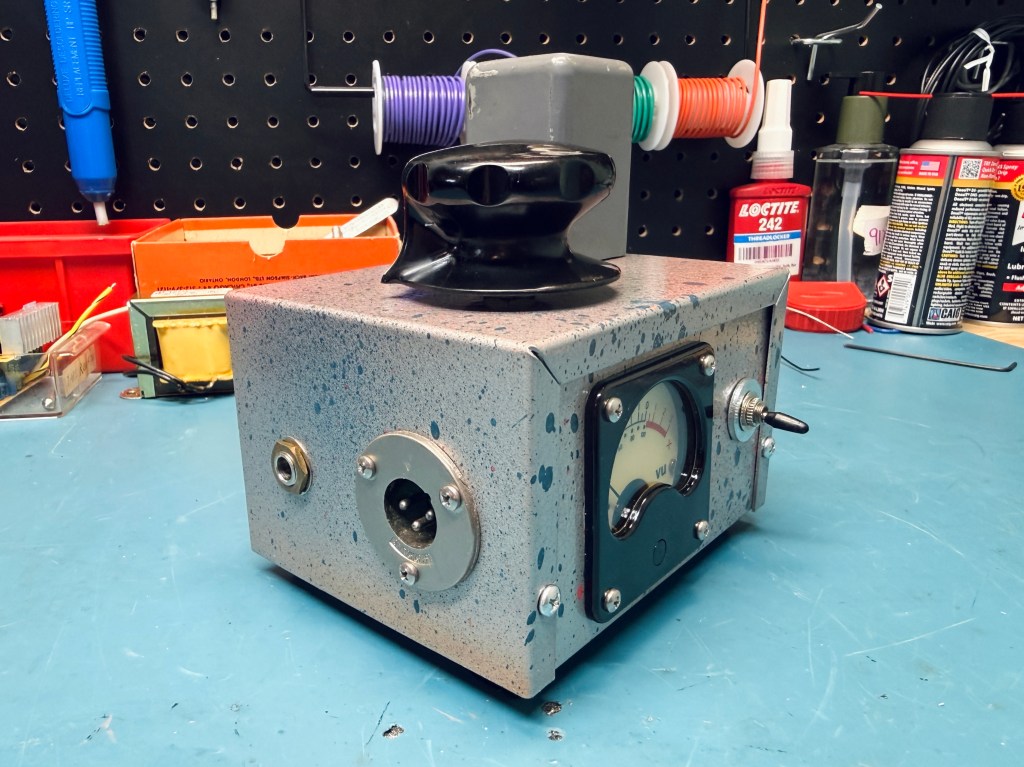
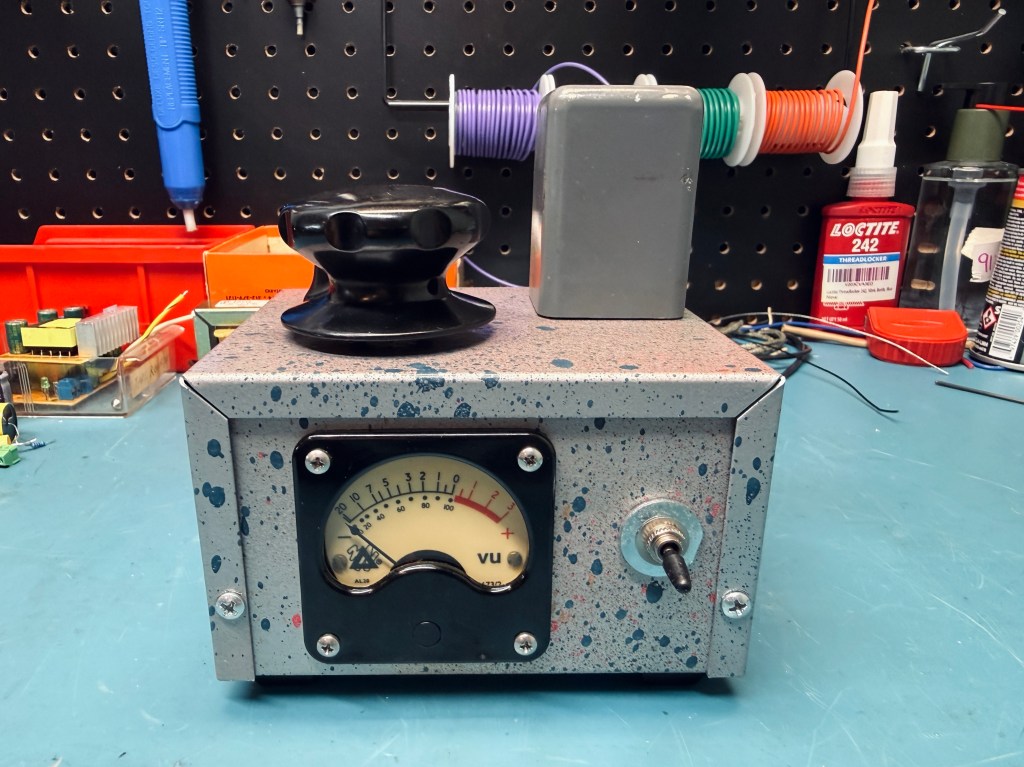
I built everything into a small metal enclosure with a textured, speckled finish. The large black knob on top controls the output level, and the front panel houses the VU meter and its toggle switch.
The ADC transformer is mounted externally on top of the enclosure, which gives the whole thing a slightly industrial, vintage-test-equipment appearance.
How Does It Sound?
The initial results have been excellent.
The box gives me a usable balanced output from the Altec without requiring any permanent modifications to the amplifier. More importantly, I’m able to record through the 342B’s original tube power stage and output transformer, which was one of my main goals.
The change from the original 1.5kΩ series resistor to 220Ω made a particularly noticeable difference in usability. I can now obtain the line level I need without driving the amplifier excessively hard.
Because the box is entirely passive, it doesn’t introduce another active amplification stage or require a separate power supply.
There’s still some room for testing, especially around frequency response, distortion, VU-meter calibration, and the thermal performance of the dummy load, but I’m happy with how the design is working so far.
Final Thoughts
One of the things I enjoy most about working with vintage recording equipment is finding new ways to use it without losing sight of what made it interesting in the first place.
Not everything needs to be gutted, rebuilt, or modified beyond recognition to become useful in a modern studio.
In the case of the Altec 342B, a handful of passive components, a vintage output transformer, and a little experimentation were enough to make it considerably more practical for recording.
I still have the original amplifier, complete with its speaker outputs and the option to use it as a guitar amplifier. But now I also have a transformer-balanced recording output that lets me explore the sound of the complete circuit.
Hopefully, this project is useful to anyone else who has one of these old Altec mixers and is looking for a way to incorporate it into their studio.
As always, be careful working with tube amplifiers. The voltages inside can be lethal, and a tube power amplifier should never be operated without an appropriate output load. A dummy-load resistor also requires proper heatsinking, ventilation, and temperature verification before extended use.
Sometimes the simplest solutions are the most satisfying.


Leave a Reply